Table of Contents
Individual elements in the document object model are the pieces that make up your webpage. Using JavaScript, after you query for them, you can manipulate them to your liking, and we'll go over the most-used manipulations.
Adding Classes
For many different scenarios, you'll want to be able to add a CSS class to an element. After you have queried for your element, like this:
HTML<div class="apple">Apples are tasty.</div>
JAVASCRIPTconst fruit = document.querySelector(".apple");
You can add a class to the element, like this:
JAVASCRIPTconst fruit = document.querySelector(".apple");
fruit.classList.add("tasty");
Now the element looks like this:
HTML<div class="apple tasty">Apples are tasty.</div>
Removing Classes
Removing a class is the same process in reverse. Once you have an element, you can remove a class from its class list, like so:
JAVASCRIPTconst fruit = document.querySelector(".apple");
fruit.classList.remove("tasty");
The class is no longer there.
Check if element contains class
Finally, to check if an element contains a class or not, simply call the contains function on the element's class list.
JAVASCRIPTconst fruit = document.querySelector(".apple");
fruit.classList.add("tasty");

if (fruit.classList.contains("tasty")) {
    console.log("This fruit is tasty!");
} else {
    console.log("This fruit is not tasty!");
}
HTMLThis fruit is tasty!
Setting Properties
Properties on DOM elements can be manipulated in JavaScript because they are simply object properties. These are examples of some properties to work with:
value: The value of a tag (usually found on input tags).href: The link of an anchor.alt: The alternative text of an image.title: Information about an element.
Let's say you want to dynamically set an anchor tag's href tag:
HTML<a>Click here to go to Sabe.io</a>
JAVASCRIPTconst link = document.querySelector("a");
link.href = "https://sabe.io";
When the code runs, you'll get this:
HTML<a href="https://sabe.io">Click here to go to Sabe.io</a>
Getting Properties
Now, let's say you want to get the value of a input text field for a username.
HTML<input type="text" class="username">
JAVASCRIPTconst usernameInput = document.querySelector(".username");
Now that you've gotten the element, all you need to do is access its value property, like so:
JAVASCRIPTconst usernameInput = document.querySelector(".username");
const usernameValue = usernameInput.value;

console.log(usernameValue);
HTMLPikachu
Since this is JavaScript after all, if you really wanted to, you could create your own properties.
HTML<span>Halloween is my favorite holiday.</span>
JAVASCRIPTconst span = document.querySelector("span");
span.holiday = "Halloween";

console.log(span.holiday);
This would result in the following output on your console:
HTMLHalloween
Deleting Properties
If you've created a new property but then decide that you no longer want it, you can use the delete statement on it to get rid of it.
JAVASCRIPTconst span = document.querySelector("span");
span.holiday = "Halloween";

console.log(span.holiday);

delete span.holiday;

console.log(span.holiday);
HTMLHalloween
undefined
Getting Attributes
Similar to properties, you can also manipulate an element's attributes. The only difference is that instead of accessing it as a property, this time you are using methods.
To get an attribute, simply use getAttribute and then pass in the name of the attribute you want.
HTML<img src="https://sabe.io/cat.png">
JAVASCRIPTconst animal = document.querySelector("img");

console.log(animal.getAttribute("src"));
Since we are asking for the src attribute, that is what we get back:
HTMLhttps://sabe.io/cat.png
Setting Attributes
Setting an attribute is just as easy as getting them. Use the setAttribute method which takes two parameters, the name of the attribute, and then its value.
HTML<img src="https://sabe.io/cat.png">
JAVASCRIPTconst animal = document.querySelector("img");
animal.setAttribute("alt", "This is a picture of a cat.");
Running this code gives you this element:
HTML<img src="https://sabe.io/cat.png" alt="This is a picture of a cat.">
Removing Attributes
Finally, to remove an attribute from an element, use removeAttribute and pass in the name of the attribute you want gone.
Let's remove the alt attribute we just added:
JAVASCRIPTconst animal = document.querySelector("img");
animal.removeAttribute("alt");
HTML<img src="https://sabe.io/cat.png">
Dynamically Applying Styles to Elements
Dynamically applying styles to an element is one of the most powerful techniques you can use when done correctly.
With some basic HTML like this:
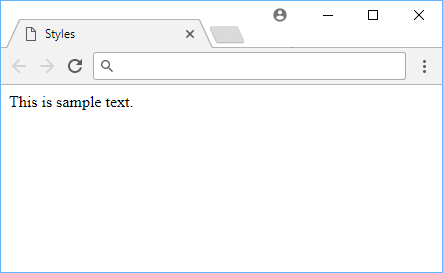
HTML<div>This is sample text.</div>
You can print out all of the styles being applied to this element and their values with getComputedStyle.
JAVASCRIPTconst div = document.querySelector("div");
const style = getComputedStyle(div, null);

console.log(style);
HTMLCSSStyleDeclaration
Because the styles are all nicely organized for us as properties, adjusting or reading the styles of elements becomes extremely easy.
For example, this is how to turn that div's background color to red:
JAVASCRIPTconst div = document.querySelector("div");
div.style.backgroundColor = "red";
 Before background color change.
 After background color change.
This works for every style property, but here are some others you can try out:
backgroundColor: Adjust the background color.display: Adjust the display value.color: Adjust the text color.border-radius: Adjust the border's radius.padding: Adjust the padding inside an element.margin: Adjust margins around an element.
The possibilities here are limited only by your imagination.
Resources
 Getting Started with Svelte
 Getting Started with Express
 Create an RSS Reader in Node
 Best Visual Studio Code Extensions for 2022
 How to deploy a Deno app using Docker
 How to deploy a MySQL Server using Docker
 How to deploy an Express app using Docker
 Getting Started with Sass
 Using Puppeteer and Jest for End-to-End Testing
 How to Scrape the Web using Node.js and Puppeteer
 Creating a Twitter bot with Node.js
 Building a Real-Time Note-Taking App with Vue and Firebase