
In this tutorial, we will be building a real-time note-taking app using Vue via its vue-cli to build the user interface and Google's Firebase for the back-end infrastructure. This app will function as a virtual notebook where you can take notes on, as you will have a collection of pages and each page will be editable with its own title and content. The data will be kept in sync with Firebase so it remains available to you once you return.
Here is a look at the finished note-taking app:
 The note-taking app we will be building.
Also, feel free to check out the demo for this app by clicking here. Before we dive in, you'll need to ensure you meet the prerequisites for this tutorial.
Prerequisites
- Basic HTML knowledge is needed. If you're new, check out our class on HTML.
- Intermediate JavaScript knowledge is also needed. If you need a refresher, check out our class on JavaScript.
- Knowledge of Vue. If you're not too comfortable with it, we have a great tutorial on getting started.
- Node and NPM installed. If you don't have them installed, follow our how to install Node guide.
All of the CSS will be provided and no prior knowledge of Firebase is needed. This tutorial will guide you through it all!
Installing vue-cli
Let's get started by first installing vue-cli. To do this, run the following command:
BASHnpm install -g vue-cli
This command will install vue-cli globally so you can use it anywhere you want. After that completes, we want to initialize our brand new Vue project:
BASHvue init webpack notebook
This will initialize a new webpack-powered Vue project with the name notebook, the name of our note-taking app. You don't really need to know too much about webpack other than it will be what turns our .vue files into the formats that the browser can understand, namely HTML, CSS and JavaScript.
When you run the command, you will get asked a bunch of questions and you can mostly just select whatever option you want, but you can get away with just hitting enter. For consistency, this tutorial will assume these settings:
BASHvue init webpack notebook

? Project name notebook
? Project description A Vue.js project
? Author Sabe.io <[email protected]>
? Vue build standalone
? Install vue-router? No
? Use ESLint to lint your code? No
? Set up unit tests No
? Setup e2e tests with Nightwatch? No
? Should we run `npm install` for you after the project has been created? npm
If done properly, you should see:
BASH# Project initialization finished!
# ========================

To get started:

  cd notebook
  npm run dev

Documentation can be found at https://vuejs-templates.github.io/webpack
If you follow the commands outlined, you can see the default Vue app by running these commands:
BASHcd notebook
npm run dev
 The default Vue app.
Diving into Vue
At this point, your project should look something like this:
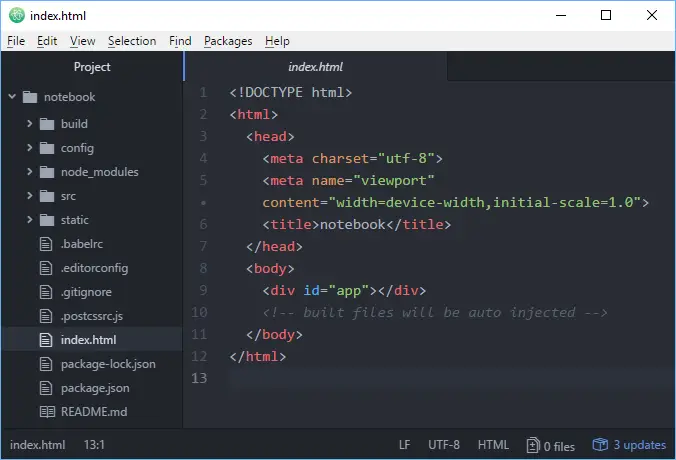 Our project folder structure.
There's definitely a lot here, but there's no reason to feel overwhelmed. A lot of this stuff is "under-the-hood" things that you don't need to worry about for now.
Inside src/main.js:
JAVASCRIPT// The Vue build version to load with the `import` command
// (runtime-only or standalone) has been set in webpack.base.conf with an alias.
import Vue from 'vue'
import App from './App'

Vue.config.productionTip = false

/* eslint-disable no-new */
new Vue({
  el: '#app',
  template: '<App/>',
  components: { App }
})
You will see the entry point for our Vue app. In here, Vue is imported, alongside the App.vue component, and rendered at the element with id of #app.
What is a .vue file?
Open up App.vue to take a look. You should see:
HTML<template>
  <div id="app">
    <img src="./assets/logo.png">
    <HelloWorld/>
  </div>
</template>

<script>
import HelloWorld from './components/HelloWorld'

export default {
  name: 'app',
  components: {
    HelloWorld
  }
}
</script>

<style>
#app {
  font-family: 'Avenir', Helvetica, Arial, sans-serif;
  -webkit-font-smoothing: antialiased;
  -moz-osx-font-smoothing: grayscale;
  text-align: center;
  color: #2c3e50;
  margin-top: 60px;
}
</style>
A .vue file is a single file where an entire component is defined. In here you put the template to render, the JavaScript to run, and the CSS styles that are to be applied to this component.
.vue files are all-in-ones that allow you to work on a component in a single file instead of going all over the place.
Vue Setup
Before we start working on new stuff, perhaps it is best to get rid of things we don't need. Feel free to delete assets/logo.png and components/HelloVue.vue.
Now, let's take a step and remember what we're trying to build here so we can determine how to structure the app. As a relatively simple note-taking app, it is logically to break this up into three components:
App.vue: Container component that holds all of the other components.Notebook.vue: Component that contains all of our pages.Page.vue: Component that holds and handles a single page in our notebook.
The app will also be supporting three main operations:
- Adding new pages
- Changing between pages
- Updating pages
- Deleting pages
The adding feature will be handled as part of the Notebook component whereas the updating and deleting features will live as part of the Page component.
Page Component
This component is the easier one, so we'll start here by creating Page.vue inside components. A single page is simple, only containing a string for the title and a string for the content.
Here is how the template looks like:
HTML<div class="page">
<div v-if="page">
<label for="title">Title</label>
<input type="text" v-model="page.title" class="title" name="title" placeholder="Enter a title" />
<label for="content">Content</label>
<textarea class="content" name="content" v-model="page.content" placeholder="Enter some content"></textarea>
<button @click="deletePage()">Delete Page</button>
<button @click="savePage()">Save Page</button>
</div>
<div v-else>
<h1>← To start, create a new page!</h1>
</div>
</div>
First we check if we have valid page data to work with and if not, it will display a message telling the user how to start using the app. Once we have a page, we bind two modals, one being page.title and the other being page.content. Finally, we have our two buttons to handle our two supported operations for this component, deleting the current page, and saving the current page.
The JavaScript is extremely simple:
JAVASCRIPTexport default {
  name: "Page",
  props: ["page"],
  methods: {
    deletePage () {
      this.$emit("delete-page")
    },
    savePage () {
      this.$emit("save-page")
    }
  }
}
We are giving this component the name Page, defining the only property as being the page object itself, and then two methods that each emit an event to the parent component to handle.
With styles included, here is the full Page.vue file:
HTML<template>
<div class="page">
<div v-if="page">
<label for="title">Title</label>
<input type="text" v-model="page.title" class="title" name="title" placeholder="Enter a title" />
<label for="content">Content</label>
<textarea class="content" name="content" v-model="page.content" placeholder="Enter some content"></textarea>
<button @click="deletePage()">Delete Page</button>
<button @click="savePage()">Save Page</button>
</div>
<div v-else>
<h1>← To start, create a new page!</h1>
</div>
</div>
</template>
<script>
export default {
name: "Page",
props: ["page"],
methods: {
deletePage () {
this.$emit("delete-page")
},
savePage () {
this.$emit("save-page")
}
}
}
</script>
<style scoped>
.page {
width: 100%;
padding: 2rem;
box-shadow: 3rem 0 5rem 3rem #c1f5ff;
}
.content, .title {
border-style: none;
border-radius: 0.25rem;
border: solid 1px lightgray;
width: 100%;
box-sizing: border-box;
margin-bottom: 1.25rem;
}
.content:focus, .title:focus {
outline: 0;
}
.content {
font-family: "Avenir", Helvetica, Arial, sans-serif;
resize: vertical;
font-size: 1.5rem;
padding: 0.5rem;
height: 20rem;
}
.title {
font-size: 2rem;
padding: 0.5rem 1rem;
}
label {
margin-bottom: 0.5rem;
display: inline-block;
}
button {
border-style: none;
padding: 0.5rem 0.75rem;
background-color: #44abc3;
margin-right: 1rem;
border-radius: 0.25rem;
color: white;
font-size: 1rem;
cursor: pointer;
}
button:hover {
background-color: #368ea2;
}
</style>
Notebook Component
Moving on to our next component, we can now begin work on the Notebook component, the component that handles the list of pages. Create Notebook.vue inside components:
HTML<div class="notebook">
    <ul>
        <li
            v-for="(page, index) of pages"
            class="page"
            v-bind:class="{ "active": index === activePage }"
            @click="changePage(index)"
            v-bind:key="index"
            >
            <div>{{page.title}}</div>
        </li>
        <li class="new-page" @click="newPage()">New Page +</li>
    </ul>
</div>
All we're doing here is iterating over each page, one for each li element, giving it a class of active-page if that page happens to be the one in use, and setting a click listener to change to that page when clicked on.
At the end, we are adding a special li element that will act as a button you can click on that will create a new page. Here we attach a separate click listener for that.
The JavaScript for our Notebook component is similarly as small:
JAVASCRIPTexport default {
  name: "Notebook",
  props: ["pages", "activePage"],
  methods: {
    changePage (index) {
      this.$emit("change-page", index)
    },
    newPage () {
      this.$emit("new-page")
    }
  }
}
We just have two properties, one is the array of all the pages, and another is a number keeping track of which one the user is on. Our two methods simply emit the event to the parent to handle.
With styles included, here is the full Notebook.vue:
HTML<template>
    <div class="notebook">
        <ul>
            <li v-for="(page, index) of pages" class="page" v-bind:class="{ 'active': index === activePage }" @click="changePage(index)" v-bind:key="index">
                <div>{{page.title}}</div>
            </li>
            <li class="new-page" @click="newPage()">New Page +</li>
        </ul>
    </div>
</template>

<script>
  export default {
    name: "Notebook",
    props: ["pages", "activePage"],
    methods: {
      changePage (index) {
        this.$emit("change-page", index)
      },
      newPage () {
        this.$emit("new-page")
      }
    }
  }
</script>

<style scoped>
    .notebook {
        max-width: 20rem;
        width: 30rem;
        background: #ecfcff;
    }

    ul {
        list-style-type: none;
        padding: 0;
        margin: 0;
        height: 100%;
        position: relative;
    }

    li {
        padding: 1rem;
        font-size: 1.25rem;
        min-height: 1.5rem;
        white-space: nowrap;
        overflow: hidden;
        text-overflow: ellipsis;
    }

    li:hover {
        cursor: pointer;
        background-color: #c5edf5;
    }

    .active {
        background-color: #80cee0;
    }

    .active:hover {
        background-color: #5caec1;
    }

    .new-page {
        background-color: #233b5d;
        color: white;
        position: absolute;
        bottom: 0;
        width: 100%;
        box-sizing: border-box;
    }

    .new-page:hover {
        background-color: #182c48;
    }
</style>
The heavy-lifting is done in App.vue, which we'll get into right now.
App Component
We already have a App.vue as it came with the project initialization, so now it is just a matter of transforming it so that it integrates seamlessly with our other components.
Here's the template:
HTML<div id="app">
    <Notebook @change-page="changePage" @new-page="newPage" :pages="pages" :activePage="index" />
    <Page @save-page="savePage" @delete-page="deletePage" :page="pages[index]" />
</div>
As a refresher, Notebook is handling page changes and creating new pages, which is why you see @change-page="changePage" and @new-page="newPage". It also requires the list of pages and the active page, which we pass in with :pages="pages" and :activePage="index".
The Page component is handling saving a page and deleting a page, which is why you have @save-page="savePage" and @delete-page="deletePage". Finally, the Page component only needs to have access to the currently active page, not the entire list, so we'll just pass in that single page from the array with :page="pages[index]".
Now we can move on to the JavaScript:
JAVASCRIPTimport Notebook from './components/Notebook'
import Page from './components/Page'

export default {
  name: 'app',
  components: {
    Notebook,
    Page
  },
  data: () => ({
    pages: [],
    index: 0
  }),
  methods: {
    newPage () {
      this.pages.push({
        title: '',
        content: ''
      })
      this.index = this.pages.length - 1
    },
    changePage (index) {
      this.index = index
    },
    savePage () {
      // nothing as of yet
    },
    deletePage () {
      this.pages.splice(this.index, 1)
      this.index = Math.max(this.index - 1, 0)
    }
  }
}
First, we import our two components, Notebook and Page. We name our component as usual and give it the list of components we will be using, Notebook and Page.
Second, we define the data() function which represents the pieces of data this component needs. We only need an array of pages and a number to hold the current page's index in the array.
Finally, we define our four supported operations:
newPage()creates a new object and pushes it onto our array and then sets the active page to the last element in the array (in other words, to the page we just pushed).changePage()takes the desired index as a parameter and updatesthis.indexto that new value.savePage()does nothing for now since we'll support this when we integrate the app with Firebase.deletePage()removes the currently active page from the array and sets the index to the next valid index.
Here is the full App.vue component:
HTML<template>
  <div id="app">
      <Notebook @change-page="changePage" @new-page="newPage" :pages="pages" :activePage="index" />
      <Page @save-page="savePage" @delete-page="deletePage" :page="pages[index]" />
  </div>
</template>

<script>
import Notebook from './components/Notebook'
import Page from './components/Page'

export default {
  name: 'app',
  components: {
    Notebook,
    Page
  },
  data: () => ({
    pages: [],
    index: 0
  }),
  methods: {
    newPage () {
      this.pages.push({
        title: '',
        content: ''
      })
      this.index = this.pages.length - 1
    },
    changePage (index) {
      this.index = index
    },
    savePage () {
       // nothing as of yet
    },
    deletePage () {
      this.pages.splice(this.index, 1)
      this.index = Math.max(this.index - 1, 0)
    }
  }
}
</script>

<style>
html, body, #app {
    height: 100%;
}

body {
    margin: 0;
}

#app {
    font-family: 'Avenir', Helvetica, Arial, sans-serif;
    display: flex;
    flex-direction: row;
}
</style>
With all three components set, you can now save all your files and run your app. Again, to run it, run this:
BASHnpm run dev
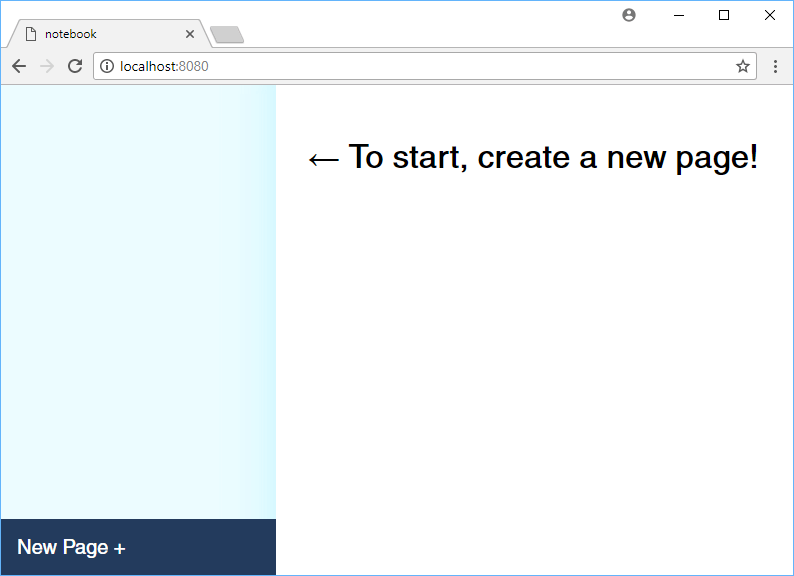 Before creating a page.
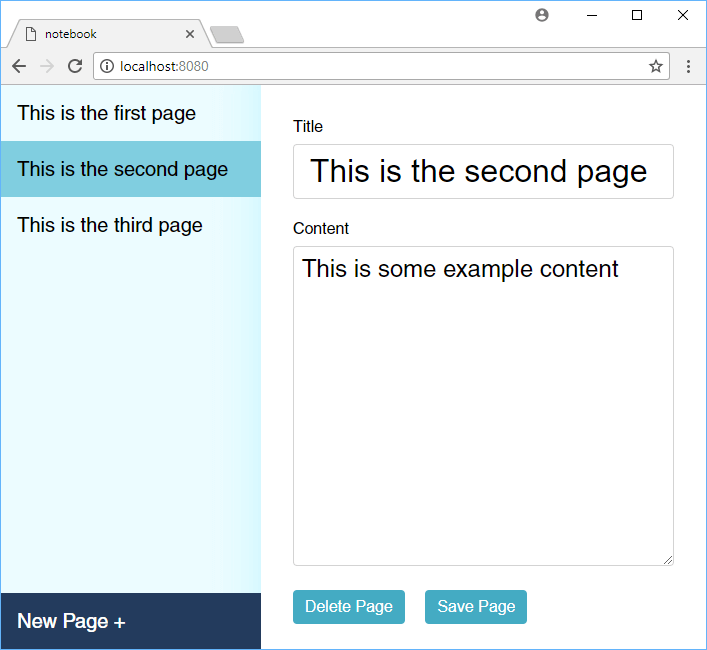 After creating a page.
As you can see, the app is already functional. You can do most actions just fine. However, if you were to refresh or otherwise close the tab, the data will be lost. We want our data to persist so we can just make changes or create new pages, hit save and not have to worry about our data being lost.
Introduction to Firebase
Firebase is a platform on which one can use to easily build apps on top of. While it offers a ton of features, for this tutorial we are only interested in their real-time database. With it, any changes we make can be added to the database, and if we refresh, we will see the data returned to us.
![]() The Firebase logo.
The Firebase logo.
To get started, head on over to the Firebase homepage.
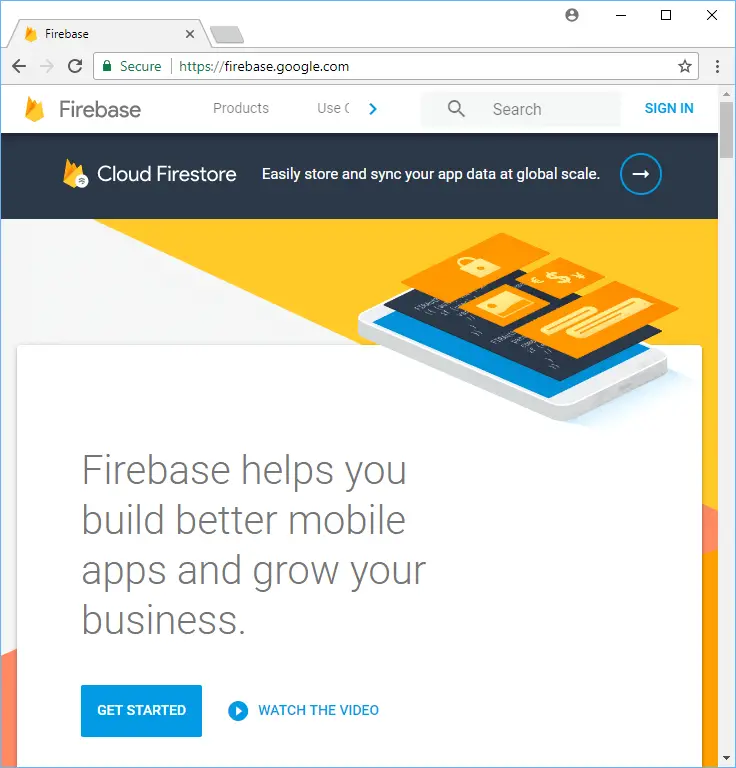 The Firebase homepage.
Click on GET STARTED and sign in with your Google account, or make one if you don't have one.
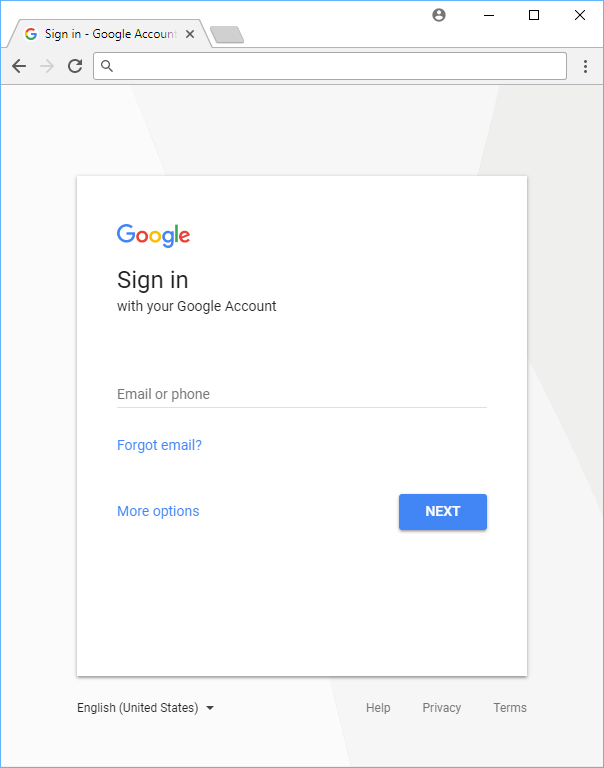 The Google sign-in page.
After you signed in, you are now at the Firebase getting started page.
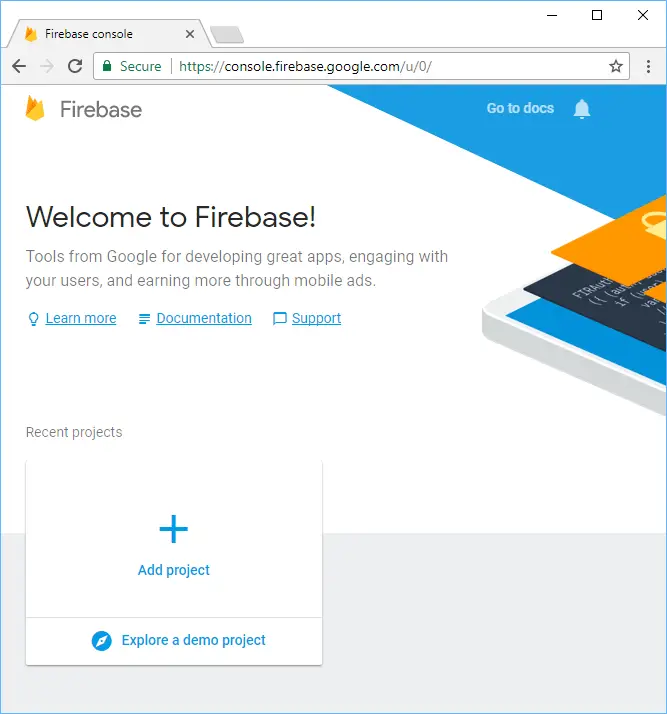 Firebase getting started page.
Click on "Add project", name your project notebook, select your country/region, and then hit CREATE PROJECT.
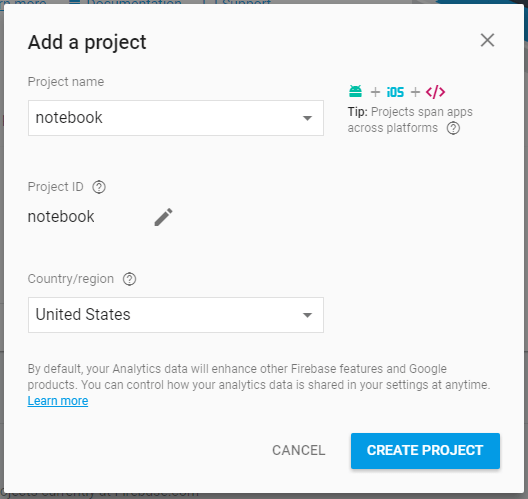 Creating a new project on Firebase.
Once that is done, you are at the Firebase project overview page.
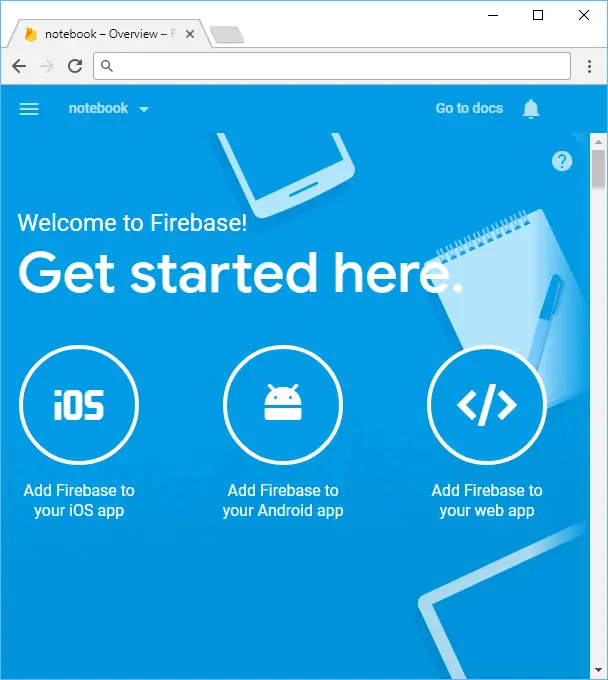 The Firebase project overview page.
Since what we are building is a web app, hit the "Add Firebase to your web app" button to get your code snippet.
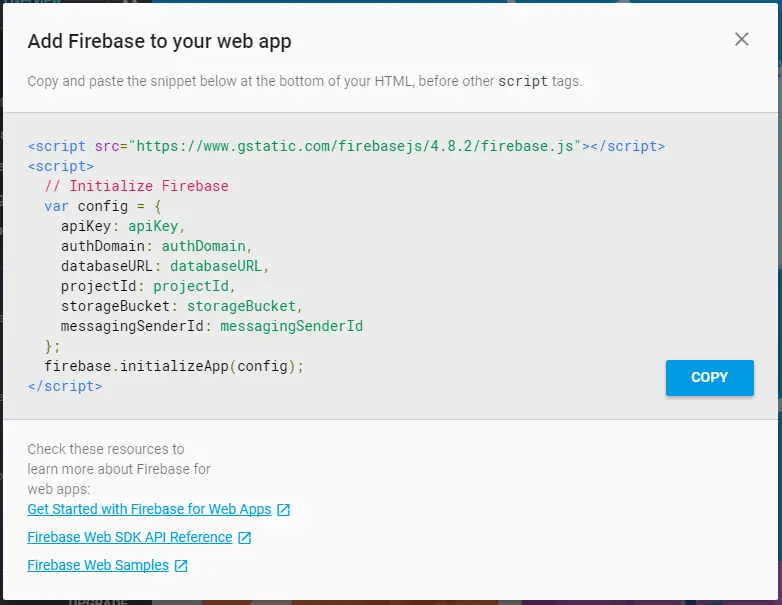 Your Firebase project code snippet.
That information is what Firebase needs to initialize and we will be using it shortly. Otherwise, our setup is complete on Firebase's website, now we can move forward with integrating it into our app.
Firebase Setup
We won't be using Firebase via a script tag. Instead we will be installing it using npm. Run this command to install Firebase for your project:
BASHnpm install firebase
Once installed, open up your App.vue file. After our two imports of Notebook and Page, import Firebase like so:
JAVASCRIPTimport Notebook from './components/Notebook'
import Page from './components/Page'
import Firebase from 'firebase'
Now we can proceed to initialize a new Firebase database instance. Right under that, place the following, replacing the information with your code snippet from earlier:
JAVASCRIPTconst database = Firebase.initializeApp({
    apiKey: 'apiKey',
    authDomain: 'authDomain',
    databaseURL: 'databaseURL',
    projectId: 'projectId',
    storageBucket: 'storageBucket',
    messagingSenderId: 'messagingSenderId'
}).database().ref();
What this does is it calls the initializeApp method from Firebase and passes in our config information. Then we call the database() method on our Firebase instance to get back a Firebase database instance. After that, we call ref() to get the reference to the root. Since all of our items will live at the root, this is good enough for the time being.
Firebase Real-Time database
Before trying to integrate it with our app, it might help to get a better idea of what is going on. Head back on Firebase and select the "Database" option in the menu.
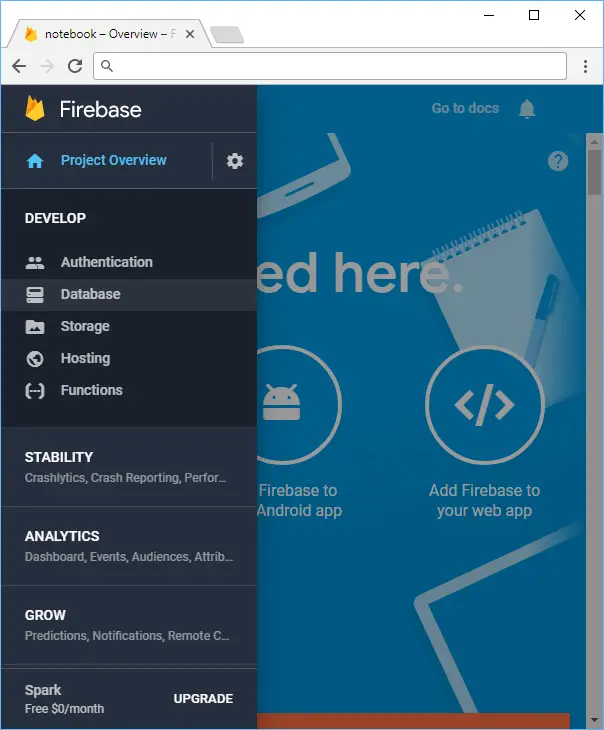 The Firebase menu.
Once there, hit GET STARTED to create your own realtime database.
 Get started with Firebase's realtime database.
Here is the root of your database. You can hover over notebook, hit the plus sign and start adding new data, in the form of a key-value pair.
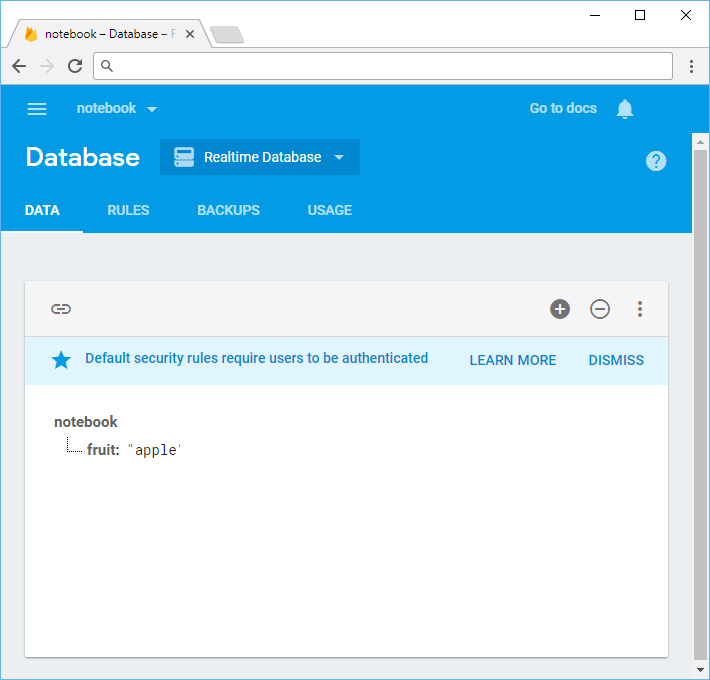 Adding a key value pair to Firebase.
You can then modify or delete that pair, or click the pair to go in further and add more data, thereby nesting it. All of this, again, is real-time, and we'll soon see how cool this becomes. Do play around with it as you wish!
There is one last thing we need to do here before we can move back to our code. At the top you should see a RULES tab. Hit that and you should see:
JAVASCRIPT{
  "rules": {
    ".read": "auth != null",
    ".write": "auth != null"
  }
}
What this is doing is saying "only allow people who are authenticated to read" and "only allow people who are authenticated to write". In other words, only people signed in can read or write to this database. For the purpose of this tutorial, to avoid having to authenticate, we will just allow anybody (which really just means us) to access the database. Do this by setting both values to true and ignoring any warnings Google displays to us:
JAVASCRIPT{
  "rules": {
    ".read": true,
    ".write": true
  }
}
With the database ready to go, let's start integrating Firebase in our app.
Firebase Integration
There are only three operations we need to support to be fully integrated with Firebase.
- Upon opening the app, data should be read once from the database.
- Saving the page should either update the data of an existing page, or insert a brand new page.
- Deleting a page should also delete it from our database.
We'll start with deleting first, since it is the easiest to implement.
Deleting data from Firebase
Currently, our deletePage() method correctly removes pages but Firebase is not yet aware of this. The method looks like this:
JAVASCRIPTdeletePage () {
  this.pages.splice(this.index, 1)
  this.index = Math.max(this.index - 1, 0)
}
The only thing we really need to do here to tell Firebase to delete the page as well. The new code looks like this:
JAVASCRIPTdeletePage () {
  const ref = this.pages[this.index].ref
  ref && ref.remove()
  this.pages.splice(this.index, 1)
  this.index = Math.max(this.index - 1, 0)
}
First we get the current page with this.pages[this.index] and then get the page's reference. Recall that a reference is what Firebase uses to keep track of items, so we will need it to tell Firebase which item in the database we are talking about. If it exists, then we can just tell Firebase to remove it with the remove() method. If the page does not have a reference, we simply move on and don't make the Firebase call at all.
Saving data to Firebase
Saving data to Firebase is a little trickier because there are actually two routes we need to take here. If the page is new and not yet in Firebase, it won't have a reference and we'll need to insert it into Firebase to get a reference for it. If the page already exists, then it will already have a reference and we'll need to use that to edit an existing page.
Instead of trying to handle both cases in a single method, let's break it up and create two more methods, updateExistingPage() and insertNewPage(). This leaves our savePage() method looking like this:
JAVASCRIPTsavePage () {
  const page = this.pages[this.index]
  if (page.ref) {
    this.updateExistingPage(page)
  } else {
    this.insertNewPage(page)
  }
},
If the active page has a reference, then it must already exist and therefore we update the page. Otherwise if it does not have a reference, then it is a new page that needs to be inserted into the database. For both methods, we just pass in the active page as a parameter.
Updating existing data in Firebase
Updating an existing page is extremely simple. We just take the page's Firebase reference and update the data in it with the update() method.
JAVASCRIPTupdateExistingPage (page) {
  page.ref.update({
    title: page.title,
    content: page.content
  })
},
Firebase does the rest from here!
Inserting new data into Firebase
If the page we are trying to save is completely new, then we need to insert it and set the page's ref property to its newly-created reference in Firebase so that we can use it to update the page in the future. Our insertNewPage() method looks like this:
JAVASCRIPTinsertNewPage (page) {
  page.ref = database.push(page)
},
Honestly, just how elegant is that line of code? 😍
We simply push the active page straight to Firebase. The return value of push is the reference to the newly-pushed item, so then we just set the value of the page's ref property to that new return value.
The brand new page was both inserted and given its own Firebase reference at the same time!
Reading data from Firebase
Now that we can successfully update, insert and delete from Firebase, the very last step to finishing this app is to support reading from Firebase once the app starts up. In Vue, you can perform actions when a component is first loaded with its mounted() method, so we'll put the reading in there.
JAVASCRIPTmounted() {
  database.once("value", (pages) => {
    pages.forEach((page) => {
      this.pages.push({
        ref: page.ref,
        title: page.child("title").val(),
        content: page.child("content").val()
      })
    })
  })
},
The Firebase docs tell us that we can use the once method to read the database once, as opposed to every single time there are changes. In this case, we are interested in reading the values, so we pass in the 'value' string. Firebase then returns to us all the pages in the database. We then iterate through each page using JavaScript's forEach method, and for every one, we push a new object to our this.pages array.
For ref, we just pass in the page's ref value from Firebase, but for title and content, we must get the child values of the page using child() to get the child and val() to get the value inside.
After the looping is completed, our this.pages array is completely populated and ready to go.
Our app is now fully integrated with Firebase and everything we do stays completely in sync! 🔥🔥🔥
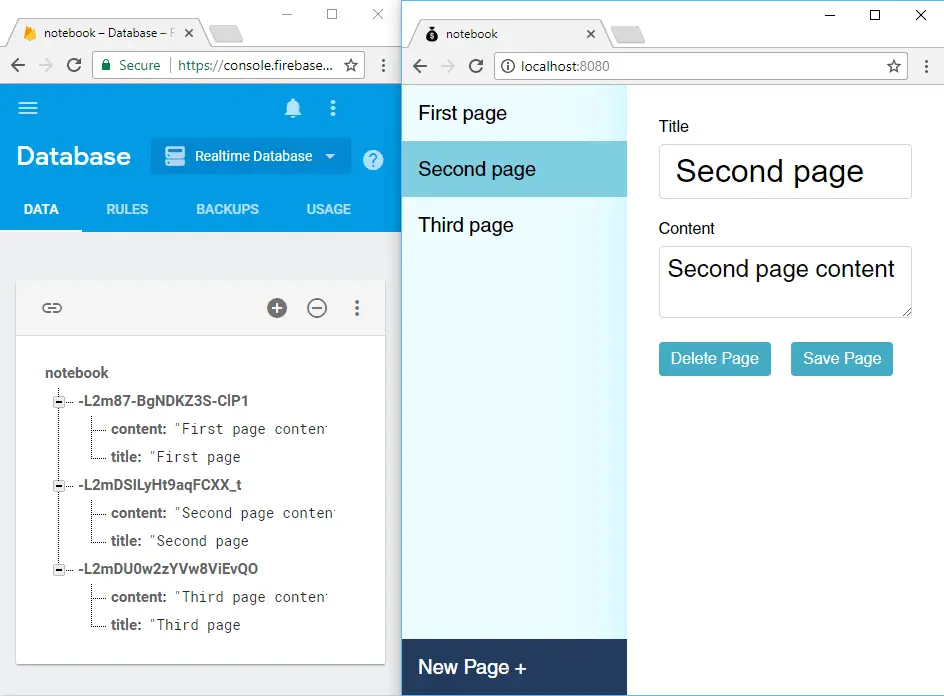 Don't forget, Firebase is real-time!
The final App.vue looks like this:
HTML<template>
  <div id="app">
      <Notebook @change-page="changePage" @new-page="newPage" :pages="pages" :activePage="index" />
      <Page @save-page="savePage" @delete-page="deletePage" :page="pages[index]" />
  </div>
</template>

<script>
import Notebook from './components/Notebook'
import Page from './components/Page'
import Firebase from 'firebase'

const database = Firebase.initializeApp({
  apiKey: 'apiKey',
  authDomain: 'authDomain',
  databaseURL: 'databaseURL',
  projectId: 'projectId',
  storageBucket: 'storageBucket',
  messagingSenderId: 'messagingSenderId'
}).database().ref();

export default {
  name: 'app',
  components: {
    Notebook,
    Page
  },
  data: () => ({
    pages: [],
    index: 0
  }),
  mounted() {
    database.once("value", (pages) => {
      pages.forEach((page) => {
        this.pages.push({
          ref: page.ref,
          title: page.child("title").val(),
          content: page.child("content").val()
        })
      })
    })
  },
  methods: {
    newPage () {
      this.pages.push({
        title: "",
        content: ""
      })
      this.index = this.pages.length - 1
    },
    changePage (index) {
      this.index = index
    },
    savePage () {
      const page = this.pages[this.index]
      if (page.ref) {
        this.updateExistingPage(page)
      } else {
        this.insertNewPage(page)
      }
    },
    updateExistingPage (page) {
      page.ref.set({
        title: page.title,
        content: page.content
      })
    },
    insertNewPage (page) {
      page.ref = database.push(page)
    },
    deletePage () {
      const ref = this.pages[this.index].ref
      ref && ref.remove()
      this.pages.splice(this.index, 1)
      this.index = Math.max(this.index - 1, 0)
    }
  }
}
</script>

<style>
html, body, #app {
    height: 100%;
}

body {
    margin: 0;
}

#app {
    font-family: "Avenir", Helvetica, Arial, sans-serif;
    display: flex;
    flex-direction: row;
}
</style>
Conclusion
If you made it this far, congrats! You now have a fully-functional and real-time note-taking app that combines Vue and Firebase together! Here are a few areas of improvement if you're feeling adventurous:
- Add the ability to search posts by title name.
- Prompt the user to hit the save button if they've made any changes.
- Support authentication so that you could release this app to the public and have different users all having their own notes to themselves.
Again, feel free to check out the live demo for this app!
Hopefully this tutorial has given you a starting point for Firebase. It truly is a powerful platform and this only scratches the surface at what it can do. If you have any questions, definitely tweet at us or contact us through any of our social media accounts!
Thank you for reading and good luck building cool things with Vue and Firebase!
Resources
- Vue Official Website
- Vue Official Docs
- vue-cli Github
- Firebase Official Website
- Firebase Docs Website
- Webpack Official Website
 Create an RSS Reader in Node
 How to deploy a .NET app using Docker
 Best Visual Studio Code Extensions for 2022
 How to build a Discord bot using TypeScript
 How to deploy a PHP app using Docker
 How to deploy a MySQL Server using Docker
 Getting Started with Sass
 Getting Started with Moment.js
 Using Push.js to Display Web Browser Notifications
 Getting Started with Vuex: Managing State in Vue
 Using Axios to Pull Data from a REST API
 How To Create a Modal Popup Box with CSS and JavaScript