In this tutorial, we will be learning how to build a simple real-time chat application using Node, Express, and Socket.io. Our chat app will support custom usernames, join and leave messages, and of course the messages themselves, all in real-time. Here is a look at the finished app:
 Socket.io running on our Express-powered Node app.
 Full chat including joining and leaving.
Before we dive in, make sure you meet the prerequisites for this tutorial:
Prerequisites
- Basic JavaScript knowledge is needed. If you need a refresher, check out our class on JavaScript.
- Node and NPM installed. If you don't have them installed, follow our how to install Node guide.
Being familiar with HTML and CSS helps but is not needed as both will be provided with no changes needed.
Setting Up Express
Create a folder anywhere you'd like to serve as the root directory for your app. Navigate to that folder and initialize a new project by running
BASHnpm init
Feel free to enter in whatever information you'd like. After that finishes running, you will be left with a file called package.json. Install express by running this command:
HTMLnpm install -save express
Now let's create a file for Node to run as our server. Create a file called index.js and put this in it:
JAVASCRIPTimport express from "express";
import * as http from 'http';

const app = express();

const http = http.Server(app);
const port = process.env.PORT || 3000;

app.get("/", function(req, res) {
    res.sendFile(__dirname + "/index.html");
});

http.listen(port, function() {
    console.log("Listening on *:" + port);
});
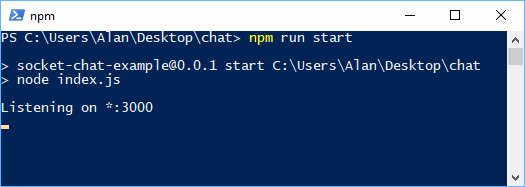
With these few lines of code, we are doing quite a number of things. We are using express to serve up a static index.html file to the browser whenever it detects a GET request at the root (/), and then telling our server to listen to the port we defined. You can run the server right now by doing either npm run start or node index.js, however since we haven't started on index.html, nothing will happen.
How the server looks when you run it.
Creating index.html
Let's create index.html to serve as the file we get from the server. Place this markup inside:
HTML<!DOCTYPE html>
<html>
    <head>
        <title>Real-time Chat App</title>
        <meta name="viewport" content="width=device-width,minimum-scale=1,initial-scale=1">
    </head>
    <body>
        <ul class="messages"></ul>
        <form>
            <input type="text" class="input" autocomplete="off" autofocus />
            <button>Send</button>
        </form>
    </body>
</html>
This is a basic file that sets up the markup for our chatbox and input form. For simplicity's sake, we will incorporate both our styles and JavaScript code in this file. You can always put them in separate files if you want though.
Here are all the styles you will need:
CSSbody {
    margin: 0;
    font-family: sans-serif;
}

form {
    position: fixed;
    bottom: 0;
    left: 0;
    width: 100%;
    display: flex;
    box-sizing: border-box;
    padding: 0.25rem;
}

form input {
    border: 0;
    padding: 0.5rem;
    width: 100%;
    outline: 0;
    margin-right: 0.5rem;
    border-radius: 0.25rem;
    background: #ccc;
}

form button {
    width: 6rem;
    background-color: #1b8c00;
    color: white;
    border: none;
    padding: 0.5rem;
    cursor: pointer;
    border-radius: 0.25rem;
    text-transform: uppercase;
}

form button:hover {
    background-color: #166d01;
}

.messages {
    margin: 0;
    padding: 0;
    margin-bottom: 3rem;
}

.messages li {
    padding: 0.5rem;
}

.messages li:nth-child(odd) {
    background: #eee;
}
And here is the start of the JavaScript:
JAVASCRIPTconst form = document.querySelector("form");
const input = document.querySelector(".input");
const messages = document.querySelector(".messages");
const username = prompt("Please enter a username: ", "");

form.addEventListener("submit", function(event) {
    event.preventDefault();

    addMessage(username + ": " + input.value);

    input.value = "";
    return false;
}, false);

addMessage("You have joined the chat as '" + username  + "'.");

function addMessage(message) {
    const li = document.createElement("li");
    li.innerHTML = message;
    messages.appendChild(li);
    window.scrollTo(0, document.body.scrollHeight);
}
The code here is really simple. The first three assignments are just querying the page for the form, input button, and our messages list. The fourth one is the prompt that asks you what username you'd like to use. After that we attach a listener to prevent the form from submitting, add the message we sent by calling the addMessage function, then we reset the value of the input so that we can use it for the next message.
The addMessage function takes a string as a parameter and uses it to set the contents of a brand new li element. That new element is then appended to the messages list. Finally, we scroll to the bottom of the body so that new messages are always in view.
The entire file should look something like this:
HTML<!DOCTYPE html>
<html>
    <head>
        <title>Real-time Chat App</title>
        <meta name="viewport" content="width=device-width,minimum-scale=1,initial-scale=1">
        <style>
            body {
                margin: 0;
                font-family: sans-serif;
            }

            form {
                position: fixed;
                bottom: 0;
                left: 0;
                width: 100%;
                display: flex;
                box-sizing: border-box;
                padding: 0.25rem;
            }

            form input {
                border: 0;
                padding: 0.5rem;
                width: 100%;
                outline: 0;
                margin-right: 0.5rem;
                border-radius: 0.25rem;
                background: #ccc;
            }

            form button {
                width: 6rem;
                background-color: #1b8c00;
                color: white;
                border: none;
                padding: 0.5rem;
                cursor: pointer;
                border-radius: 0.25rem;
                text-transform: uppercase;
            }

            form button:hover {
                background-color: #166d01;
            }

            .messages {
                margin: 0;
                padding: 0;
                margin-bottom: 3rem;
            }

            .messages li {
                padding: 0.5rem;
            }

            .messages li:nth-child(odd) {
                background: #eee;
            }
        </style>
    </head>
    <body>
        <ul class="messages"></ul>
        <form>
            <input type="text" class="input" autocomplete="off" autofocus />
            <button>Send</button>
        </form>
        <script>
            const form = document.querySelector("form");
            const input = document.querySelector(".input");
            const messages = document.querySelector(".messages");
            const username = prompt("Please enter a username: ", "");

            form.addEventListener("submit", function(event) {
                event.preventDefault();

                addMessage(username + ": " + input.value);

                input.value = "";
                return false;
            }, false);

            addMessage("You have joined the chat as '" + username  + "'.");

            function addMessage(message) {
                const li = document.createElement("li");
                li.innerHTML = message;
                messages.appendChild(li);
                window.scrollTo(0, document.body.scrollHeight);
            }
        </script>
    </body>
</html>
Now if you were to head on over to localhost:3000, your running server should now serve you this file. Upon page load, you should get a prompt asking you to enter your desired username. After that, you should see the join message with your desired username.
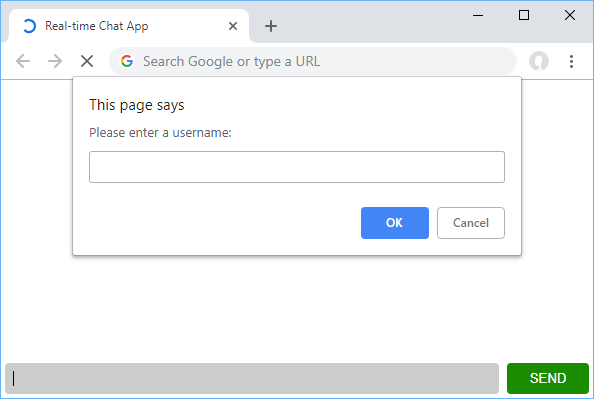 Choosing your username.
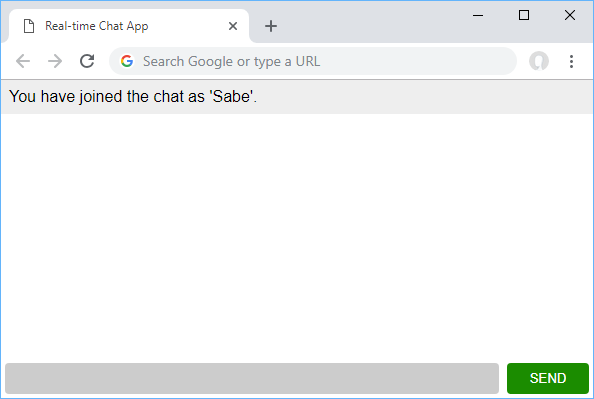 Entering chat.
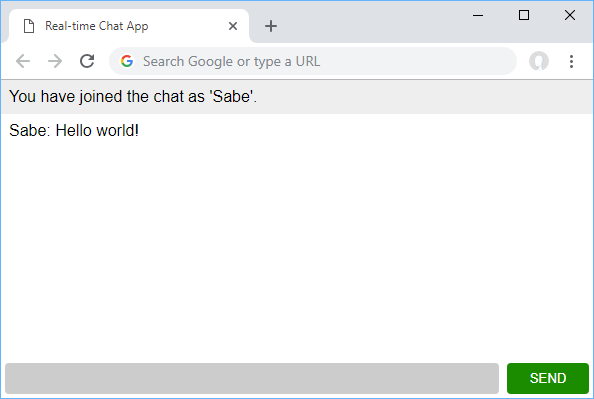 Sending a message.
If you see this, you have done everything correctly so far!
Setting Up Socket.io on the Server
As mentioned earlier, we will be using Socket.io for real-time communication between the server and client. The library is a wrapper around the WebSockets API that makes all of this possible. You could work with WebSockets directly, but Socket.io does a lot of work for us behind the scene to ensure our time working with sockets is as painless as possible.
Let's get started with actually using Socket.io. Install it by running this command:
HTMLnpm install -save socket.io
Open your index.js and add this to the top:
JAVASCRIPTimport { Server } from 'socket.io';
import express from 'express';
import { createServer } from 'http';

const app = express();
const server = createServer(app);
const io = new Server(server);
This line allows us to start using Socket.io on the server. Let's dive straight into all the code we'll need to power this app. Add this to your index.js:
JAVASCRIPTio.on("connection", function(socket) {

    socket.on("user_join", function(data) {
        this.username = data;
        socket.broadcast.emit("user_join", data);
    });

    socket.on("chat_message", function(data) {
        data.username = this.username;
        socket.broadcast.emit("chat_message", data);
    });

    socket.on("disconnect", function(data) {
        socket.broadcast.emit("user_leave", this.username);
    });
});
What this code is doing is attaching listeners to any event we want to on any incoming socket that successfully connected. In other words, if a socket connection is established, these are the events we want to listen for.
In our case the events we have are user_join which sets the username on the socket for later use and then broadcast back that data to alert others that somebody has joined, chat_message which attaches the username and then broadcasts to everybody else that a new message was sent, and disconnect which also broadcasts to everybody else that somebody has left the chat.
Believe it or not, but that's all the code we need on the server for our chat app to function. Now we can move on the client!
Setting Up Socket.io on the Client
To start using Socket.io on the client, we must import it. For simplicity's sake, we will use a CDN for this. Add this script tag in your index.html:
HTML<script src="https://cdnjs.cloudflare.com/ajax/libs/socket.io/2.2.0/socket.io.dev.js"></script>
Now you can use it, like so:
JAVASCRIPTconst socket = io();
Now that we have the capabilities to send and receive messages to and from the server, let's incorporate these new powers in our app. Your form listener should now tell the server when you sent a message. Since the server already knows the username, we only need to send the actual message, which we do like this:
JAVASCRIPTsocket.emit("chat_message", {
    message: input.value
});
Your new form listener should now look like this:
JAVASCRIPTform.addEventListener("submit", function(event) {
    event.preventDefault();

    addMessage(username + ": " + input.value);

    socket.emit("chat_message", {
        message: input.value
    });

    input.value = "";
    return false;
}, false);
Now let's add our client-sided listeners for events coming from the server. Again, these are going to be chat_message, user_join, and user_leave:
JAVASCRIPTsocket.on("chat_message", function(data) {
    addMessage(data.username + ": " + data.message);
});

socket.on("user_join", function(data) {
    addMessage(data + " just joined the chat!");
});

socket.on("user_leave", function(data) {
    addMessage(data + " has left the chat.");
});
In all three of these cases, the only thing we need to do is add a new message with the relevant information. This means adding a new message when a chat_message event is received, and then doing the same whenever somebody joins or leaves the chat.
Finally, when we load the page, we need to tell the server, and thus others, that we have joined. We do this by emitting a user_join message with the username we chose for ourselves:
JAVASCRIPTsocket.emit("user_join", username);
Put this all together, and your finalized client-sided JavaScript should look something like this:
JAVASCRIPTconst form = document.querySelector("form");
const input = document.querySelector(".input");
const messages = document.querySelector(".messages");
const username = prompt("Please enter a nickname: ", "");
const socket = io();

form.addEventListener("submit", function(event) {
    event.preventDefault();

    addMessage(username + ": " + input.value);

    socket.emit("chat_message", {
        message: input.value
    });

    input.value = "";
    return false;
}, false);

socket.on("chat_message", function(data) {
    addMessage(data.username + ": " + data.message);
});

socket.on("user_join", function(data) {
    addMessage(data + " just joined the chat!");
});

socket.on("user_leave", function(data) {
    addMessage(data + " has left the chat.");
});

addMessage("You have joined the chat as '" + username  + "'.");
socket.emit("user_join", username);

function addMessage(message) {
    const li = document.createElement("li");
    li.innerHTML = message;
    messages.appendChild(li);
    window.scrollTo(0, document.body.scrollHeight);
}
Conclusion
Putting everything together your final index.js should look like this:
JAVASCRIPTimport { Server } from 'socket.io';
import express from 'express';
import { createServer } from 'http';

const app = express();
const http = createServer();
const io = new Server(server);
const port = process.env.PORT || 3000;

app.get("/", function(req, res) {
    res.sendFile(__dirname + "/index.html");
});

io.on("connection", function(socket) {

    socket.on("user_join", function(data) {
        this.username = data;
        socket.broadcast.emit("user_join", data);
    });

    socket.on("chat_message", function(data) {
        data.username = this.username;
        socket.broadcast.emit("chat_message", data);
    });

    socket.on("disconnect", function(data) {
        socket.broadcast.emit("user_leave", this.username);
    });
});

http.listen(port, function() {
    console.log("Listening on *:" + port);
});
And your final index.html like this:
HTML<!DOCTYPE html>
<html>
    <head>
        <title>Real-time Chat App</title>
        <meta name="viewport" content="width=device-width,minimum-scale=1,initial-scale=1">
        <style>
            body {
                margin: 0;
                font-family: sans-serif;
            }

            form {
                position: fixed;
                bottom: 0;
                left: 0;
                width: 100%;
                display: flex;
                box-sizing: border-box;
                padding: 0.25rem;
            }

            form input {
                border: 0;
                padding: 0.5rem;
                width: 100%;
                outline: 0;
                margin-right: 0.5rem;
                border-radius: 0.25rem;
                background: #ccc;
            }

            form button {
                width: 6rem;
                background-color: #1b8c00;
                color: white;
                border: none;
                padding: 0.5rem;
                cursor: pointer;
                border-radius: 0.25rem;
                text-transform: uppercase;
            }

            form button:hover {
                background-color: #166d01;
            }

            .messages {
                margin: 0;
                padding: 0;
                margin-bottom: 3rem;
            }

            .messages li {
                padding: 0.5rem;
            }

            .messages li:nth-child(odd) {
                background: #eee;
            }
        </style>
    </head>
    <body>
        <ul class="messages"></ul>
        <form>
            <input type="text" class="input" autocomplete="off" autofocus />
            <button>Send</button>
        </form>
        <script src="https://cdnjs.cloudflare.com/ajax/libs/socket.io/2.2.0/socket.io.dev.js"></script>
        <script>
            const form = document.querySelector("form");
            const input = document.querySelector(".input");
            const messages = document.querySelector(".messages");
            const username = prompt("Please enter a nickname: ", "");
            const socket = io();

            form.addEventListener("submit", function(event) {
                event.preventDefault();

                addMessage(username + ": " + input.value);

                socket.emit("chat_message", {
                    message: input.value
                });

                input.value = "";
                return false;
            }, false);

            socket.on("chat_message", function(data) {
                addMessage(data.username + ": " + data.message);
            });

            socket.on("user_join", function(data) {
                addMessage(data + " just joined the chat!");
            });

            socket.on("user_leave", function(data) {
                addMessage(data + " has left the chat.");
            });

            addMessage("You have joined the chat as '" + username  + "'.");
            socket.emit("user_join", username);

            function addMessage(message) {
                const li = document.createElement("li");
                li.innerHTML = message;
                messages.appendChild(li);
                window.scrollTo(0, document.body.scrollHeight);
            }
        </script>
    </body>
</html>
Make sure to restart your server to use your new code. Once you do, you should be able to open multiple tabs on your browser, give each tab a unique name, chat across all of them in real-time, leave and join and see the messages on the other clients, just as you would expect.
Socket.io running on our Express-powered Node app.
Full chat including joining and leaving.
While this is a simple example of using Socket.io, it is very powerful and supports many more features than the ones shown here. Definitely make sure to check out the resources below to learn more about both Socket.io and WebSockets in general. Hopefully this tutorial has helped you get started with Socket.io and you found it useful!
Thanks for reading and happy building!
Resources
 How to Install Node on Windows, macOS and Linux
 Getting Started with Solid
 Managing PHP Dependencies with Composer
 How to Serve Static Files with Nginx and Docker
 How to Set Up Cron Jobs in Linux
 How to deploy a PHP app using Docker
 Getting Started with Sass
 Getting Started with Handlebars.js
 Learn how to build a Slack Bot using Node.js
 Building a Real-Time Note-Taking App with Vue and Firebase
 Setting Up a Local Web Server using Node.js
 Using Axios to Pull Data from a REST API