
In this tutorial, we will learn how to get started with Deno by building a simple application using the core standard libraries that come with it.
What is Deno
Deno is a new runtime for JavaScript and TypeScript that was created by the creator of Node.js. It is built on top of Google's V8 engine and written in Rust. This makes it secure, robust, and fast. It was created by Ryan Dahl, the creator of Node, to fix the shortcomings and mistakes made when creating Node but has since now grown into its own ecosystem. One of the biggest change is that Deno ships a single executable binary.
Why use Deno
There are many reasons to consider Deno instead of Node for server-side JavaScript. Let's go over the biggest ones:
- TypeScript: Deno has first-class support for TypeScript. This means that you can use TypeScript with no additional setup required. That's a huge plus as TypeScript continues to climb in popularity.
- Security: Deno is secure by default. It doesn't let you do basic things like access the file system, environment, or network without you explicitly granting it that permission.
- Compatibility: Deno tries to be compatible with web standards. It wants to be future-proof and does so by using modern JavaScript and TypeScript features as they are made available. Most Deno applications should work in Deno and in the browser without needing any code changes.
Differences between Deno and Node
As they were created by the same person, it is fair to consider Deno a spiritual successor to Node. With that in mind, here are the biggest differences between the two so far.
- Packages: Unlike Node, Deno does not use
npmfor packages. Instead, Deno imports modules by using URLs or file paths, just like browsers do. A huge plus is that you don't need build tools like Webpack. - Module management: Because it does not use
npm, it also does not have apackage.jsonfile like Node projects do. - Standards: As mentioned earlier, Deno keeps up with modern standards, and thus uses the latest ECMAScript standards in its standard library and APIs. In contrast, Node's standard library is callbacks-based.
With that out of the way, let's give Deno a go!
Installing Deno
The homepage of Deno has all the instructions for how to install it on your computer, but these are the most popular ways:
For Mac users, you can use brew to install Deno.
BASHbrew install deno
For Windows, you can use PowerShell
BASHiwr https://deno.land/x/install/install.ps1 -useb | iex
Either way, however you install it, you can check your version like so:
BASHdeno --version
You should output similar to this:
BASHdeno 1.16.0
v8 9.0
typescript 4.5.0
A cool thing about Deno is that it also tells you the version of the V8 Engine that it is using and the version of TypeScript that it is using.
Running an Example Application
Deno gives you examples that you can run to test that your installation of Deno is working. Let's run the welcome example to see if it works.
BASHdeno run https://deno.land/std/examples/welcome.ts
BASHWelcome to Deno!
It's really that simple, you've just ran your first Deno application!
Creating a Web Server
Printing a statement is great and all, but let's create an app that does a little more than that. Let's create a simple HTTP server that responds to requests with a simple message. This will allow us to directly use a standard library that comes with Deno.
Create a folder for our app, then create a file named server.ts in that folder. The structure should look like this:
BASHapp
└── server.ts
Inside server.ts let's add our HTTP server:
JAVASCRIPTimport { serve } from "https://deno.land/std/http/server.ts";

serve(req => new Response("Hello world from Deno!"), { addr: ":8080" });

console.log(`HTTP server is running at: http://localhost:8080/`);
Once that's finished, let's try running it:
BASHdeno run --allow-net server.ts
Remember that Deno is secure by default, so to allow access to networking, you must explicitly grant that permission using the --allow-net flag. You should see the following output:
BASHHTTP server is running at: http://localhost:8080/
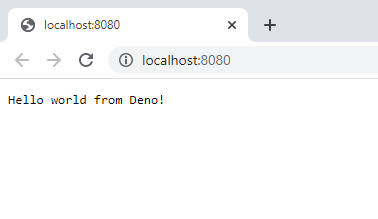 Hello world from Deno!
If you're happy with your project, and want to deploy it on Docker, read our How to deploy a Deno app using Docker tutorial. You can deploy your Deno app in production very easily once you've deployed it using Docker.
Conclusion
Deno is a new and emerging JavaScript runtime environment designed to address the shortcomings of Node with an emphasis on security, compatibility, and performance. It's decentralized approach to package management and native support for TypeScript makes it an appealing alternative for developers who want to use modern features of JavaScript and adhere to web standards used by the browser.
We hope this tutorial has helped you get started with Deno. Happy building!
Resources
 Getting Started with Solid
 How to deploy a .NET app using Docker
 How to deploy a PHP app using Docker
 How to deploy a MySQL Server using Docker
 Getting Started with Sass
 How to Scrape the Web using Node.js and Puppeteer
 Getting Started with Moment.js
 Learn how to build a Slack Bot using Node.js
 Creating a Twitter bot with Node.js
 Using Push.js to Display Web Browser Notifications
 Building a Real-Time Note-Taking App with Vue and Firebase
 Setting Up a Local Web Server using Node.js