In this tutorial, we will be creating a simple single-page application with basic routing using the new and young Moon.js library.
What is Moon.js?
 The Moon.js logo is nice. 😍
Moon.js, or Moon 🌙, is a minimalistic JavaScript library for creating user interfaces with components and templates. It features an extremely small footprint due to its small size, yet is still very powerful and performs well.
What will we be building?
As a tutorial meant for getting started, we will build a simple single-page application using the official Moon Router. In one of the routes, there will be a basic calculator that takes advantage of Moon's computed properties feature to compute the sum of two numbers.
Here's a look at the finished product (without styles):
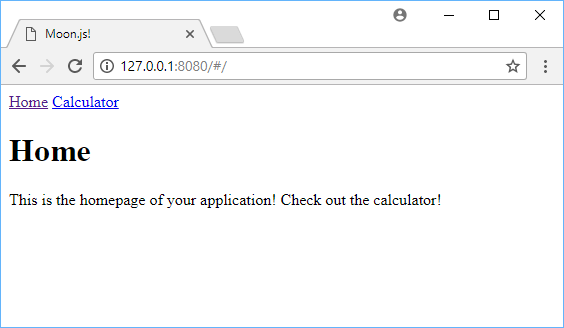 The homepage of our app.
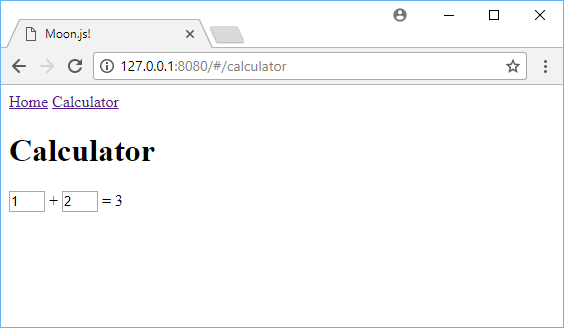 The calculator we'll be building.
This is the project with styles:
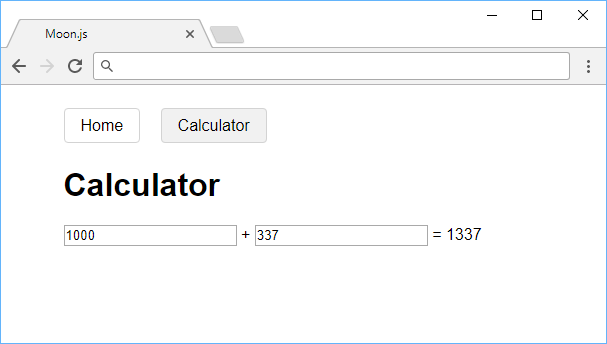 This is the styled app.
You can view the live demo before you continue this tutorial. Before we dive in, you'll need to ensure you meet the prerequisites for this tutorial.
Prerequisites
- Basic HTML knowledge is needed. If you're absolutely new, check out our class on HTML.
- Intermediate JavaScript knowledge is also needed. If you need a refresher, check out our class on JavaScript.
We'll use a tiny bit of CSS, but no knowledge is needed to complete this tutorial.
Let's get started
To get started, create two files in the same folder, index.html and app.js. Place this inside index.html:
HTML<!DOCTYPE html>
<html>
    <head>
        <title>Moon.js</title>
    </head>
    <body>
        <div id="app"></div>
    </body>
    <script src="https://unpkg.com/[email protected]/dist/moon.js"></script>
    <script src="https://unpkg.com/[email protected]/dist/moon-router.min.js"></script>
    <script src="app.js"></script>
</html>
We created the div inside body in which our app will render inside of, and then we imported these three scripts:
- Moon from unpkg.com
- Moon Router from unpkg.com
- Our local JavaScript script
This is how your project's folder structure should look like:
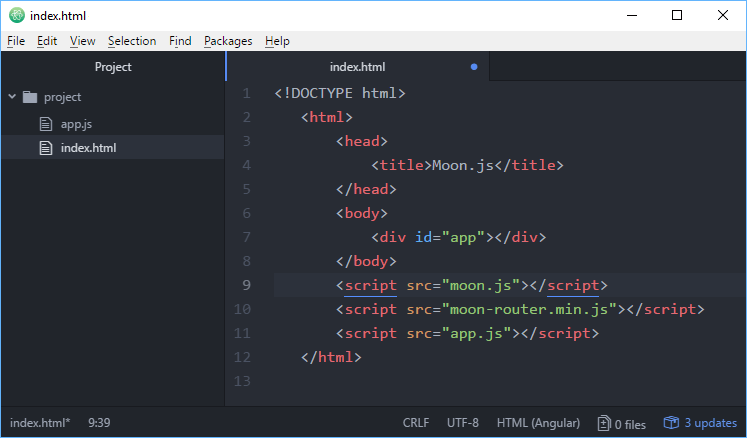 Your project's folder structure.
Now inside app.js, let's integrate Moon Router with Moon itself.
JAVASCRIPT// use Moon Router with Moon
Moon.use(MoonRouter);

// create a router with the two following routes:
// set "/" route to use the "Home" component
// set "/calculator" route to use the "Calculator" component
const router = new MoonRouter({
    map: {
        "/": "Home",
        "/calculator": "Calculator"
    }
});

// create new instance of moon, work inside of #app
// and pass in the router for Moon to use
new Moon({
    el: "#app",
    router: router
});
We set Moon to use Moon Router, we created our two routes, told Moon what component to render when that route is valid, and then told it what element to render inside of.
Router Links
To make our lives easier, let's create a navigational header using router links that is present throughout the entire app. This will allow us to easily transition between our two routes. Place this inside #app:
HTML<nav>
    <router-link to="/">Home</router-link>
    <router-link to="/calculator">Calculator</router-link>
</nav>
Now when you click on Home, you go to the / route, and if you click on Calculator, you go to the /calculator route.
Router View
To complete our index.html file, let's add a router view so that Moon knows where to render our yet-to-be-created components. We want it to render under the nav, so your final body should look like this:
HTML<div id="app">
    <nav>
        <router-link to="/">Home</router-link>
        <router-link to="/calculator">Calculator</router-link>
    </nav>
    <router-view></router-view>
</div>
Components
One of the beautiful things about Moon.js is, of course, its support for components. We told Moon where to render our components, we just need to create them now.
Swing back over to app.js and add the component for the homepage:
JAVASCRIPTMoon.component("Home", {
    template:
        `<div>
             <h1>Home</h1>
             <p>This is the homepage of your application! Check out the calculator!</p>
         </div>`
});
Our homepage does nothing, functionally. It only serves to prompt you to click on the other page for our calculator. This is why the only thing we give to Moon is the name of the component, in this case, Home, and then the template to render.
The real fun is our calculator component, and here it is:
JAVASCRIPTMoon.component("Calculator", {
    data: () => ({
        number1: 1,
        number2: 2
    }),
    template:
        `<div>
             <h1>Calculator</h1>
             <input type="number" m-model="number1">
             +
             <input type="number" m-model="number2">
             =
             <span>{{total}}</span>
         </div>`,
     computed: {
        total: {
            get: function() {
              return +this.get("number1") + +this.get("number2");
            }
        }
    }
});
Let's break it down.
JAVASCRIPTdata: () => ({
    number1: 1,
    number2: 2
}),
The data function in Moon is where you put all the pieces of data that your component needs to properly function.
JAVASCRIPTtemplate:
    `<div>
         <h1>Calculator</h1>
         <input type="number" m-model="number1">
         +
         <input type="number" m-model="number2">
         =
         <span>{{total}}</span>
     </div>`,
Most of this is standard HTML, but not all.
Remember our two pieces of data from before? In Moon, m-model is a directive that ties the value of the input to the value of our data. In other words, when we use the number input, Moon automatically remains in sync with it.
The {{total}} tells Moon where to render the results of the total function.
Computed Properties
Another cool part of Moon is its computed properties. You can think of these as dynamic variables whose value automatically updates whenever another variable changes. If we change the numbers being added, we would, of course, want the total to be accurate and up-to-date, and computed properties do just that for us.
JAVASCRIPTcomputed: {
       total: {
           get: function() {
             return +this.get("number1") + +this.get("number2");
           }
       }
   }
The total function just converts our two pieces of data into numbers, then returns their sum for us.
Moon then renders this number on the page and we have a beautiful and working calculator.
Running your Moon application
To run your application, simply open index.html in your browser of choice. You should see something similar to this:
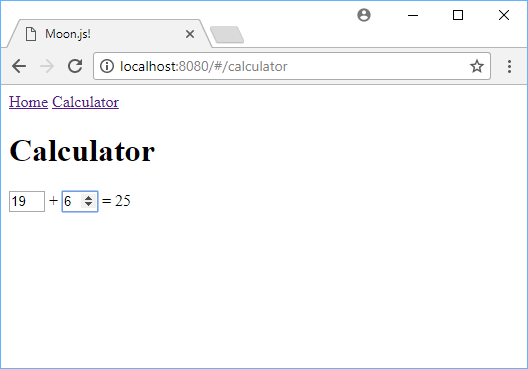 A look at our Moon.js-powered calculator!
Here is the final code:
HTML<!DOCTYPE html>
<html>
    <head>
        <title>Moon.js</title>
    </head>
    <body>
        <div id="app">
            <nav>
                <router-link to="/">Home</router-link>
                <router-link to="/calculator">Calculator</router-link>
            </nav>
              <router-view></router-view>
        </div>
    </body>
    <script src="https://unpkg.com/[email protected]/dist/moon.js"></script>
    <script src="https://unpkg.com/[email protected]/dist/moon-router.min.js"></script>
    <script src="app.js"></script>
</html>
JAVASCRIPTMoon.use(MoonRouter);

Moon.component("Home", {
    template:
        `<div>
             <h1>Home</h1>
             <p>This is the homepage of your application! Check out the calculator!</p>
         </div>`
});

Moon.component("Calculator", {
    data: () => ({
        number1: 1,
        number2: 2
    }),
    template:
        `<div>
             <h1>Calculator</h1>
             <input type="number" m-model="number1">
             +
             <input type="number" m-model="number2">
             =
             <span>{{total}}</span>
         </div>`,
     computed: {
        total: {
            get: function() {
              return +this.get("number1") + +this.get("number2");
            }
        }
    }
});

const router = new MoonRouter({
    map: {
        "/": "Home",
        "/calculator": "Calculator"
    }
});

new Moon({
    el: "#app",
    router: router
});
You can apply these optional styles to make the whole thing look a little better.
CSSbody {
    width: 30rem;
    margin: 2rem auto;
    font-family: sans-serif;
}
nav {
    margin-bottom: 2rem;
}
a {
    color: black;
    text-decoration: none;
    margin-right: 1rem;
    border: solid lightgray 1px;
    padding: 0.5rem 1rem;
    border-radius: 0.25rem;
}
.router-link-active {
    background-color: #f1f1f1;
}
This makes the app look like this:
This is the styled app.
Again, if you want to check out a live demo of this app working, we have one here.
Conclusion
Moon.js is still a fairly new library, but that's no reason not to go further with it. With this tutorial under your belt, you've already been exposed to numerous features including routing, computed properties, templates, and directives. Feel free to read through their documentation and learn more about the Moon API to create much cooler things.
I hope this tutorial gave you a good start working with Moon.js. If you've enjoyed this, it would help a lot if you shared this on Facebook, Twitter and LinkedIn. 😊
 Good luck building with Moon.js!
Resources

 Getting Started with TypeScript
 Getting Started with Solid
 Getting Started with Express
 How to Serve Static Files with Nginx and Docker
 How to Set Up Cron Jobs in Linux
 How to deploy a .NET app using Docker
 How to build a Discord bot using TypeScript
 How to deploy a PHP app using Docker
 How to deploy a Deno app using Docker
 How to deploy a Node app using Docker
 Getting Started with Sass
 Learn how to use v-model with a custom Vue component